
This guide was written by timmy and Mikalya.
Longsword is a weapon with plenty of mobility, chainable counters, and quick moves that are easily cancellable into each other. While previous games focused more on the counter aspect of the weapon, Wilds Longsword currently focuses on a single, short, damage loop.
This Weapon is for you if you:
- Like using counters to deal with monsters
- Want a weapon with long reach and fluid movement
- Enjoy using the same 2 moves over and over again
- want very long sword xd
The following is a list of the most commonly used moves:
Basic moves:
- Step Slash:
- Thrust:
- Fade Slash: +
- Spirit Blade I:
- Crimson Slash I: during Red Spirit
- Foresight Slash: + after any attack
- Special Sheathe: + after any attack
- Iai Slash: from Special Sheathe
- Iai Spirit Slash: from Special Sheathe
- Spirit Helmbreaker (SHB): +
- Spirit Release Slash (SRS): after SHB
- Sheathe:
- Dodge:
- Focus Mode:
- Focus Strike: + on wound
Important Combos:
- Spirit Combo: Spirit Blade I -> Spirit Blade II -> Spirit Blade III -> Spirit Roundslash: -> -> ->
- Foresight Slash -> Spirit Roundslash: + ->
- Special Sheathe -> Iai Spirit Slash: + ->
- Foresight Whirl Slash -> Spirit Roundslash -> Spinning Crimson Slash: + -> ->
- Optimal Loop: Crimson Slash I -> Spirit Slash I: ->
- Spirit Helmbreaker -> Spirit Release Slash: + ->
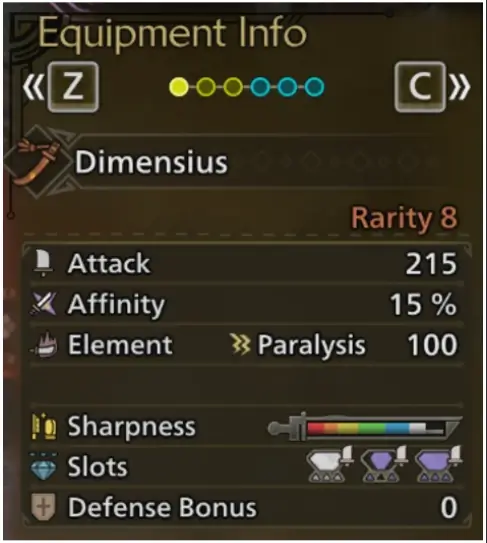 3.0A - Weapon Stats
- Attack: Important for all Playstyles, universal damage, usually referred to as Raw. Wilds, for the first time ever, lets us choose between Bloat and True values, the option for that is in Game Settings -> Page 3: Weapon Attack Power Display -> Display Without Coefficent. This Guide will only care about True Values.
- Sharpness: Acts as a modifier for Raw and Elemental Damage. Being a High Rank Game, every set will want to have white sharpness throughout the overwhelming majority of any given hunt. Unlike other Weapon types, Longsword does not have built-in sharpness reduction modifiers, every input consumes 1 unit of Sharpness. Due to the quick sharpness consumption of the optimal combo, Longsword will use Master’s Touch to maintain sharpness.
| Sharpness | Raw Mod | Elemod |
|---|---|---|
| Purple | 1.39 | 1.25 |
| White | 1.32 | 1.15 |
| Blue | 1.2 | 1.0625 |
| Green | 1.05 | 1 |
| Yellow | 1 | 0.75 |
| Orange | 0.75 | 0.5 |
| Red | 0.5 | 0.25 |
| Fig 3.0B - Sharpness Table | ||
- Element: Status and Element is listed here if applicable, depending on the specific set you aim for, all of these can be important, or they can not matter.
- Affinity: Every important Move in Longsword’s kit is able to crit, making it the singular strongest stat in the current state of the game.
- Defense Bonus: Due to the nature of the Defense stat's scaling, any additional defense is unlikely to have an impact on damage received, making it a negligible Bonus at best. Safe to ignore.
- Slots: All maxed out weapons have either 3-2-1 or 3-3-1 slots. The exceptions are Artian weapons, which have 2-2-2 on the Rarity 6 and 7, and 3-3-3 on the rarity 8 Versions, always.
Longsword revolves around two main mechanics: Spirit Gauge and Spirit Levels. Using normal attacks generates Spirit Gauge, while Spirit Attacks (ZR) spend it.
Some attacks also have special interactions with Spirit Gauge. Iai Slash will generate 100% of the Spirit Gauge over 15 seconds, and Foresight Slash will consume 100% of the Spirit Gauge to counter. However, if no gauge is present, FSS will not act as a counter and instead generate 10% gauge. More info on FSS (and other counters) later.
 4.0A - Spirit Gauge, Spirit Level (White)
Landing Spirit Roundslash, countering with Iai Spirit Slash, or breaking a wound with Focus Strike will give you a Spirit Level. The Spirit Levels go from White -> Yellow -> Red, and give 2/5/10% attack, respectively. Red Spirit will also change some attacks, making it very important to reach Red as quickly as possible. Below is the list of new moves:
- Foresight Slash -> Foresight Whirl Slash: removes return slash but hits twice while moving
- Overhead I/I/Crescent Slash -> Crimson I/II/III: Hits 2/2/3 times, also has more movement
- Spinning Crimson Slash -> only available on Red and after Roundslash
- Spirit Roundslash on Red also moves you more than normal, so Spirit Roundslash -> Spinning Crimson Slash can be used to cover distance
 4.0B - Red Spirit
When on Red, the Spirit Gauge works differently. It will decay over 50 seconds, and most attacks will not regenerate the bar. However, there are several attacks which will affect the gauge:
4.0B - Red Spirit
When on Red, the Spirit Gauge works differently. It will decay over 50 seconds, and most attacks will not regenerate the bar. However, there are several attacks which will affect the gauge:
- Foresight Whirl Slash: Consumes 16% gauge, recovers 4% per hit if timed successfully
- Spirit Roundslash: Halts decay for 5s if it lands (first time only), also restores 20/10/6% Spirit Gauge the first 3 times it lands. However, the regen decay is shared with Spinning Crimson Slash.
- Iai Spirit Slash: Restores 20% gauge upon successful counter if it lands (only once)
Focus Mode/Strike
Like all other weapons, we can enter Focus Mode with ZL, and press R for a small hit. If it hits a wound as shown on the left, it unleashes a strong multi-hit attack. The 2 followup hits that come after stabbing the sword can be aimed with Focus Mode to target other wounds. Each wound destroyed with Focus Strike will grant a Spirit Level. To maximize Red Gauge uptime, Focus Strike should be used right before dropping from Red to Yellow Spirit.
Another big addition was the Corrupted Mantle, which gives some attacks a weaker secondary hit. For LS, it applies to Overhead I/II, Crescent Slash, Spirit Roundslash, Spinning Crimson Slash, Crimson Slash I/II/III. Due to Mantle timers not resetting on either Quest End nor Quest Start, this will go largely ignored for the sake of this guide, as it is likely to be relegated to speedruns only.
Sneak Attack
While a monster has not spotted you and is not engaged in combat and grounded, you can approach it from behind and follow the button prompt () to use Sneak Attack, a reasonably strong attack that also grants some Spirit Gauge.
The standard opener for most monsters is to Sneak Attack -> Spirit Charge -> Spirit Roundslash -> ISS roar.
Longsword has one notable playstyle:
Crimson I + Spirit I spam.
This will revolve around getting red as quickly as possible with counters, then using this loop as much as possible on the monster. Counters are still used to maintain dps. Spirit Helmbreaker (+Spirit Release Slash) is also an option, but has niche usage.
Iai Spirit Slash
after Special Sheathe will allow you to use Iai Spirit Slash, or ISS. If successful, hitting a monster will raise the Spirit Level, add an extra hit of damage, and grant short iframes -> hyper armor. You will also be able to Special Sheathe again. However, failing to counter an attack with ISS will prevent you from doing this.
Iai Slash
after Special Sheathe will go into Iai Slash. This has hyper armor at the start and will regenerate 100% of the Spirit Gauge over 15 seconds.
Foresight Slash
+ after most attacks will use the entire Spirit Gauge and some stamina to evade and counter an attack. If successful, the return slash will refill the gauge and allow you to follow up with Spirit Roundslash. Grants 30% attack and hyper armor for 1s after a successful counter.
Foresight Whirl Slash
Foresight Whirl Slash can only be used on Red, but works like Foresight Slash. However, there is no return slash, it only uses 16% of the gauge, and will attack twice during the evasion. A successful counter can be followed with Spirit Roundslash -> Spinning Crimson Slash. Also grants 30% attack and hyper armor for 1s after a successful counter.
Spirit Charge
Holding after any attack will drain stamina to use Spirit Charge. Release will use Spirit Blade I/II/III or Spirit Roundslash depending on how long it is held. On Red Spirit only, this move grants hyper armor right after releasing .
Spirit Thrust, Spirit Helmbreaker, and Spirit Release Slash
+ will use Spirit Thrust, which grants hyper armor at the start. Hitting a monster will launch you into the air, allowing you to press to spend a Spirit Level for Spirit Helmbreaker. Using again will go into Spirit Release Slash, which will spend a Spirit Level again. SRS has hyper armor during the entire animation. Note that SHB requires at least White Spirit to perform, and SRS needs Yellow. However, you should only ever use SHB from Red anyways.
It’s worth noting that spamming SHB + SRS alone and ignoring Crimson spam is a ‘viable’ playstyle. While it falls significantly behind with Element, the difference is rather small when using Raw.
Crimson Loop
The highest sustained DPS combo in Longsword’s kit.
While in Red Spirit, from pretty much anything:
Crimson Slash I -> Spirit Blade I -> repeat
The loop is 80 MV and 2.4 elemod over 1.5 seconds. (~53.3 MV and ~1.6 elemod per second, respectively). It requires being in Red Spirit, but has virtually no startup or endlag. Each loop lasts around ~1.5s, is easily cancellable, and can be chained into Special Sheathe or FWS.
Note that Crimson I moves you ever so slightly forward, so adjust accordingly. You can use the left stick to move even further with both Crimson I and Spirit I, and Focus Mode can be used to change directions mid combo.
SHB + SRS Spirit Helmbreaker into Spirit Release Slash has 420 MV and 7.4 elemod over 6 seconds (~70 MV and ~1.23 elemod per second, respectively). This means it has more burst damage than Crimson Loop in the 6 seconds it takes to use SHB + SRS. However, if you account for the time it takes to get back to red from white, Crimson Loop outperforms SHB + SRS for extended DPS windows. There are several uses for this such as:
- Using the hyper armor from Spirit Thrust to ignore an attack
- Monster is about to leave zones so you use SHB + SRS for burst
- Monster is about to die or almost within capture HP so you use SHB + SRS for burst
- Red Spirit is about to run out and wounds are to get back to red quickly
This section will be short due to how new the game is.
Focus Strike:
Focus Strike can be used to instantly gain back Red Gauge. Ideally, it is used just before dropping to yellow for minimum downtime.
Might Pill:
Might Pills now overwrite the buff but not the timer of Might Seeds, meaning that if you take a seed and then a pill, after the pills 20 seconds are over, Might Seed applies again. Useful at the start of a hunt for more Sneak Attack damage.
Counterstrike:
Countering, Hyper armoring and getting hit with knockback procs Counterstrike. At level 3, it gives 25 raw for 45 seconds. LS has several ways to reliably proc this which are:
- Using ISS to hyper armor attacks with long or multiple hitboxes
- Delaying Roundslash after FSS to hyper armor
- Eating an attack during Spirit Thrust, Spirit Release Slash, after Spirit Charge, or Focus Strike
Spirit Charge Cancels:
Spirit Charge is usually used only at the start of the quest after the Sneak Attack in order to get a Spirit Level during the flinch. However, Spirit Charge does have other uses. Before it was mentioned that a failed ISS would not allow you to Special Sheathe again, but this can be bypassed to some extent by holding Spirit Charge after the failed ISS then immediately using Special Sheathe. Foresight Slash can also be used to cancel Spirit Charge. This is very niche but allows you to chain counters in specific situations.Spirit Release Slash Aiming
- Inexperienced: Players who barely know the weapons moveset, having very little understanding of its mechanics and intricacies, having very little or no experience playing it at all.
- Intermediate: Players who have an understanding of the weapons moveset, can hit about half of their counters, and can clear quests reliably within 8-15 minutes.
- Advanced: Players who can target and hit parts at will, formulate and change their gameplan, hit most of their counters, have good spatial awareness and usually clear without carting within 6-8 minutes.
- Expert: Players who have good understanding of the moveset, nail nearly all of their counters, have great positioning and Red Spirit upkeep and usually clear any quest within 4-6 minutes. In addition, they have a good general grasp of most monster’s movesets.
Longsword is just Dual Blades except one sword and its long lmao